Friday 18 March 2016

National Child Sexual Exploitation Awareness Day 18th March 2016

It's National Child Sexual Exploitation Awareness Day.  My other job is Project Manager for The WiSE Project, run by YMCADLG and funded by Comic Relief and the Sussex and Surrey Police and Crime Commissioners. We work alongside the local authorities and Police forces to safeguard children and young people and support victims through one to one work, group work, schools work and training and awareness raising for professionals. The definition we use is that "sexual exploitation is someone taking advantage of you sexually, for their own benefit. Through threats, bribes, violence, humiliation or by telling you that they love you they will have the power to get you to do things for their own or other people's enjoyment" (The Nia Project).

What can you do?
- first of all, remember that CSE can happen to any child of any age, gender, ethnicity, ability, sexuality. And when I say child I mean anyone under the age of 18. Just because someone reaches the age of consent doesn't mean they can't be exploited. You can't consent to exploitation. It is a child protection issue. It is child abuse. 

As a parent, aunt, uncle, friend or family of a child:
- do whatever you can to build self esteem, resilience and challenge negative body image. There are some good resources and tips on www.selfesteem.dove.co.uk
- model positive, healthy relationships. This is going to be their benchmark for what's acceptable in a relationship.
- let them know that it's ok to make mistakes. I confess I find it hard not to snap when mine drop their juice cups 50 times a day. But I try not to, because long term I want them to know that it's ok to make mistakes and that they can come to me with them without fear of reprimand. 
- talk to children about relationships, consent, sex, rights and responsibilities. When it's appropriate show them things like the Consent/Cup of Tea vid - https://youtu.be/fGoWLWS4-kU
- Encourage, embrace and push for sex and relationship education in schools. DO NOT BE AFRAID OF IT. If they don't get this information in school or at home they'll find it elsewhere. And the Internet is full of not particularity great, and outright dangerous, examples of sexual relationships. 
- Educate yourself:
          - www.net-aware.org.uk lists the sites that children and young people are into and what we need to be aware of.
          - www.thinkuknow.com has loads of tools and resources for children of all ages, parents, teachers and ways to report concerns. 
- Know how to report concerns around CSE. In Sussex you can call the police on 101 and quote 'Operation Kite' and they'll know you're worried about CSE. This isn't for when a crime has been committed. This is for stuff you might have heard or be worried about and you don't know what to do. Eg people, places, cars that concern you because you've seen or heard something that makes you feel uncomfortable. The Police aren't going to leap into action and barge doors down. They'll record it and analyse it alongside all the information they have. It may be an important piece of a puzzle that seems fairly insignificant on its own. 

And you can contact me at any time if you have any questions or concerns, as that's my job! Well done for making it to the end of this post!

The #StopCSE social media campaign is using the hashtag #helpinghands and asking people to write and share pledges on their hands.  Here's one from a colleague:

Saturday 3 January 2015

Towner Art Gallery & Museum

I've just found this in my drafts! Sorry folks. I've since been back 3 times and each time has been great. J enjoyed a couple of workshops over the summer holidays - lovely staff and all free! Here's the original post...

New Year's resolution #1: do more interesting stuff. 

New Year's resolution #2: revive blog. 

Today I shall achieve both! I bought Ben an Eric Ravilious book for his birthday in the summer and we both really enjoy his artwork, local connections and life story. Somewhere in my brain I knew that the Towner Art Gallery in Eastbourne had a collection of his work so we headed over, with a little uncertainty about whether or not this was a good idea with a 3 month old and 3 year old. However it quickly became clear that it's a very family friendly place. J enjoyed some arts and crafts whilst we enjoyed the exhibitions (although not at the same time - no babysitting service provided!).

J enjoying the arts and crafts table.


Rare and refreshing to see - baby changing facilities in the gents too!

Babycino


Thursday 11 September 2014

Pine Cone Mobile

When we went to France in the summer my daughter began sneaking pine cones into her bag, which she then insisted on keeping and bringing back home!  I wanted to help her do something interesting with them but thought it unlikely that they'd last until Christmas when we could spray them gold or silver and hang them as decorations.  So we sat down together and painted them in other bright colours and created a mobile for her bedroom!


We can also add to the mobile as it's just two sticks tied together with string, and the hanging items looped over.  As you can see we've already added a salt dough heart that she made - it just needed rearranging a bit to keep the balance.  We used quite rough brown string to keep it looking rustic and natural.  Plus it makes life easier if the intentional look is a bit rough around the edges!


Thursday 28 August 2014

DIY Princess Anna (Frozen) Costume

Invitation to Frozen themed birthday party = me getting very excited about making an outfit for my little person!  But life is also pretty busy at the moment (settling into new home, finishing work for maternity leave, a million other projects on the go) so I needed an idea based on simplicity and speed, yet super effective!  I found 3 that I combined for the perfect Anna costume:


I started with this Anna dress idea - purchasing a plain black t-shirt as the starting point rather than trying to make the top part.

I had also previously come across this tutu dress tutorial which is so simple yet makes such a great outfit.  I have many plans for this design for the future!  And it also worked here.

And then for the finishing touch I used this Anna & Elsa cape tutorial.

Just from the pile of coloured fabric I knew I was going to enjoy this project!


I bought a very cheap vest as my base.  My daughter is almost 3 and the smallest size I could find was age 7-8 so I had to do a bit of nipping and tucking to start with!  I then stitched gold bias binding round the arms and neck.

For ease I used appropriately coloured felt and bondaweb to create the embroidered effect rather than dealing with complicated stitching.  I found the image on the computer and traced it straight on to the paper before ironing it to the back of my felt.  I also decided to stick to 2 main colours, green and pink, with just a couple of yellow dots, rather than adhering 100% to the original design and colours.  It was then really easy to cut out, iron on to the vest and stitch.


I then got really excited and forgot to take photos, but I pretty much followed the tutu dress tutorial that I linked above as I moved on to the skirt.  A couple of adaptations...I stitched the layers of tulle as described and sewed it to the elastic but before attaching it to the top of the dress I made a lining for the skirt.  I used 1 metre of blue dress lining, closed the seam, and basted and gathered round the top in the same way as I did with the tulle and then stitched it to the same piece of elastic that the rest of the skirt was fixed to.  And another piece of gold binding stitched over all the layers (and elastic).


Once the skirt was done I could fix and stitch it to the top.


Almost done...


The final step involved more felt and bondaweb!  I made 5 tulip-shaped flowers and ironed them (evenly spaced) on to the outside layer only of the tulle skirt.  To ensure the flowers didn't mess up the other layers I placed a piece of tracing paper underneath when I ironed, as well as a square of cotton over the top.  This meant that the tulle didn't melt, and the sticky underside of the bondaweb didn't get stuck to other bits of the skirt before it cooled.


And the dress was done!


For the cape I pretty much stuck to the tutorial mentioned above, although I used a velvety fabric which required a bit of sorting before constructing the cape.  For my cape I only used half a metre of this fabric and folded it in half right sides together, so it was pretty much a square.  I stitched around the outside of the square, rounding off each corner as I went.  I left a 6 inch gap so I could turn the cape inside out so that the princessy velvetiness was then on the outside.  To finish my prep I top stitched around the whole piece.  I was then ready to follow the instructions as in the tutorial.


This involved a long basting stitch about 6 inches from the top.  Then gathered until the width is about 12 inches.


Over the top of the gather I stitched a piece of ribbon (that had enough overhang at each end to tie once worn).


To achieve the desired effect the top 6 inches folds over the ribbon so it sits just over the shoulders (and hides the ribbon stitching).  Cape done!


I was so worried that she'd refuse to wear it as I was putting so much pressure on her to try it on but she was so happy with it!


Thursday 26 June 2014

Decorate a birthday cake? Sure - I can do that.

It's not my daughter's birthday for another 3 months, but I've seen some amazing examples of mama's giving cake decorating a go recently and I wanted to share them to inspire you!


My friend Sabi recently came up with this frogtastic beauty for her little girl...


This one is amazing.  Made by a wonderful mummy and daddy for their Dora-crazy little lady.


Joelle cake popped this for her princess. It was perfect!


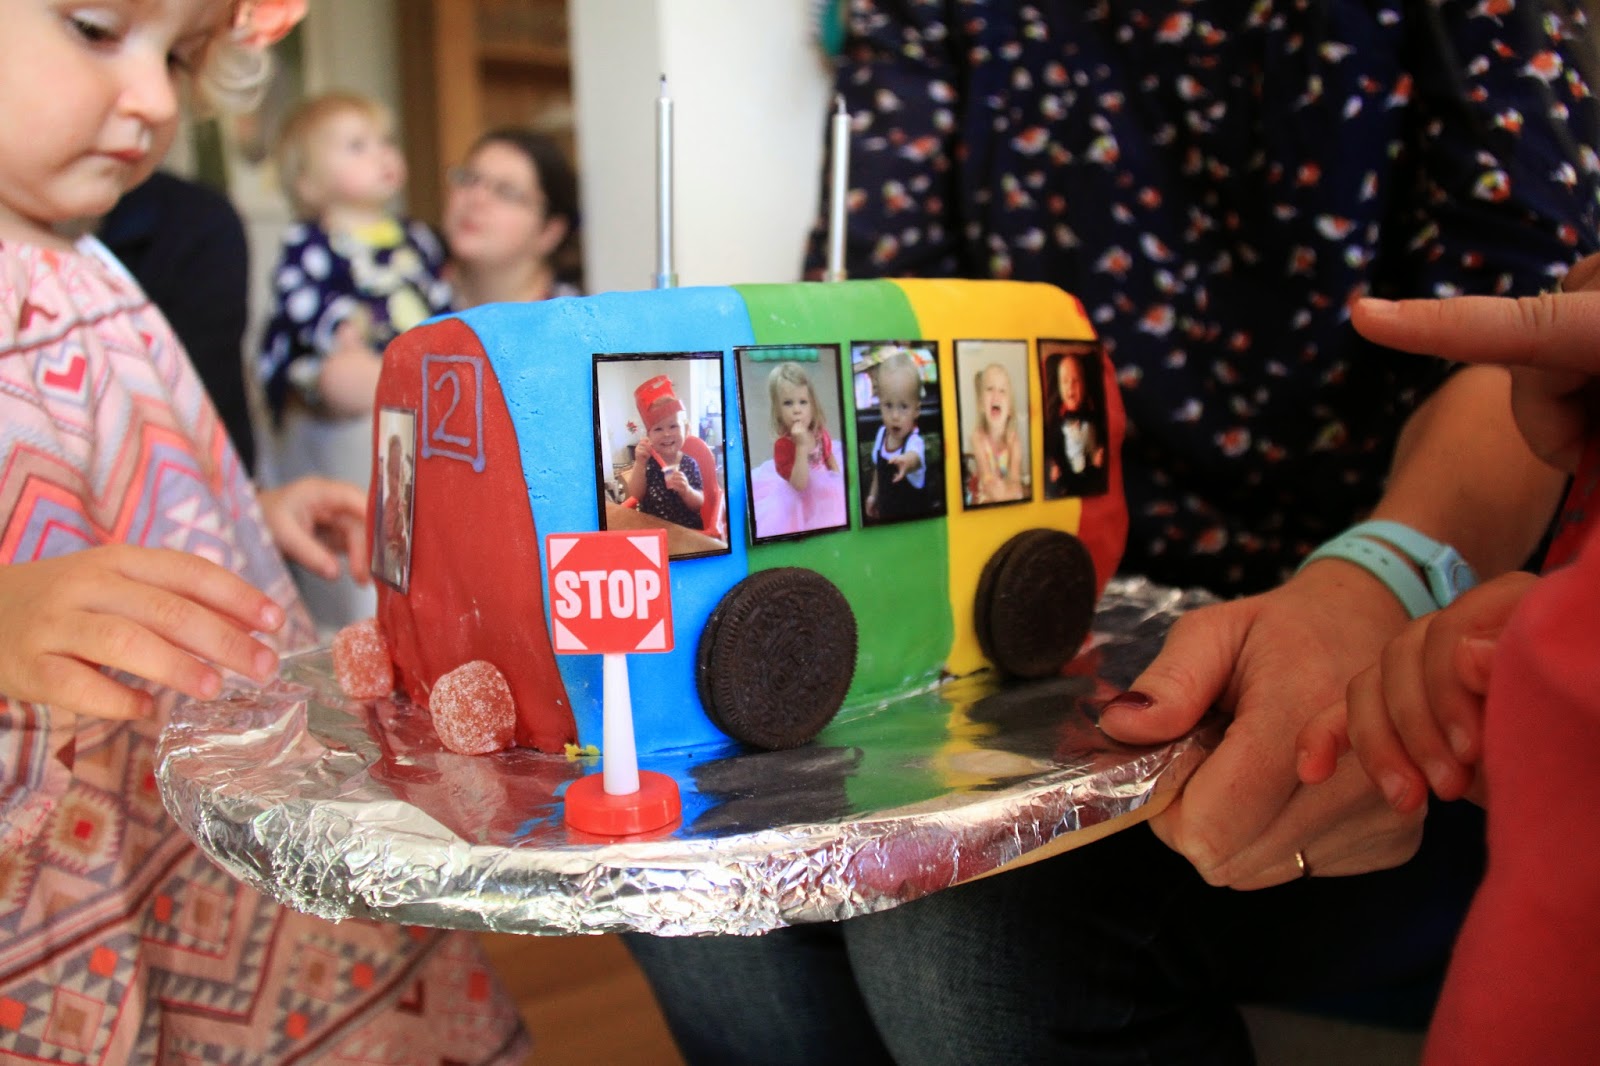
And when my daughter turned 2 last September I attempted a bus, as at the time they were her favourite thing in the world! It was supposed to be all red but I hugely underestimated the amount of icing I needed so it ended up as a bit of a disco bus!


All of these cakes decorated by amateur cake decorators and loving mums and dads.  Good work girls and boys! 

And if you've tried and failed - don't worry! That's all part of the fun! And they're never as bad as you think. Looking at craft and cake fail blogs is one of my favourite pastimes, having experienced my fair few! Have a look of you ever need a little pick-me-up...

Cake Wrecks - how the professionals can get it so wrong is beyond me!  

This blog for Pinterest inspired baking catastrophes.

Saturday 21 June 2014

Probably the quickest and easiest DIY project you'll ever see!

I harbour a disproportionate amount of rage towards all of the wires and cables that occupy my world. As per usual, I'm full of good intentions to solve the issue with a flurry of searching and pinning for neat little cable tidies and holders. For which I then lack the motivation, time or inclination to execute. But whilst sitting and thinking about how I want to get the job done but can't be bothered right now (not lazy by nature - just work, toddler, pregnancy-inflicted fatigue!) something occurred to me. All you need is velcro! And it need only cost pennies! Velcro is something I seem to have lots of and I'm not sure why. I think it's one of those items that's easy to overlook but can halt a project in it's tracks. So it is useful to always have some available - I would definitely recommend that you buy yourself a metre or two just to have around for occasions such as these. 

1. For headphones I cut a 3 inch length of velcro. For bigger/longer cables and wires just increase this length, e.g 6 inches for laptop cable.


2. Pull apart and refix with up to an inch of overhang at either end. You can adjust this once you've tried it out if it needs to be longer or shorter. 


3. Wrap and fix around annoying and disobedient wire. 


4. That's it. Done! Neat, tidy, quick and super cheap. Now sit back and feel smug about the task you've just completed!

Monday 16 June 2014

Dinosaur Dudes

There has been a sudden influx of newborns in my life!  I'm trying to keep up and came up with this simple yet super effective idea for a toy having seen some examples on Pinterest...


1.  I found an appropriate dinosaur silhouette shape to copy from an image on the computer.  Once you've found the shape you want, draw and cut it out using suitable paper, being sure to add half an inch for seam allowance - this will be your pattern.  I will do my best to upload my shape once I get it in the right format!


2. Cut 2 dinosaur shapes in desired fabric.  I've chosen one plain and one patterned print.  And yes, I did iron my fabric but it didn't seem to make much difference!


3. On opposite sides of your cut out dinosaurs use embroidery thread to stitch crosses for eyes.  I prefer doing eyes like this rather than using buttons so that I'm not creating a choking hazard!  Make sure the eyes aren't on the same sides on both pieces!   


4. A little personalisation is always a nice touch too!  An initial or a name on the tail looks sweet on these.


5. Take one shape and lay it right side up (ie with the eye facing upwards).  Choose 8 ribbons and cut about 3 inches in length.  Fold each piece of ribbon in half and pin alongside the dinosaur's back like in this picture:


6. Place your other dinosaur shape on top, right side down (so the eyes are touching).  Pin in place.


7. Using a half inch seam allowance stitch around the outside of the pinned dinosaur shape, removing pins as you go.  Leave a two inch gap at the top of the leg arch.


8. Trim corners and clip edges.  This helps the fabric lie correctly when you turn it inside out, otherwise it'll pucker and pinch.


9. Turn the shape inside out by poking it all through the hole you left in your seam.


10. Stuff your toy with suitable toy stuffing.  I also like to put a little bell inside to make it jingle!


11. I've forgotten to take a picture here, but neatly stitch up the hole in the seam by hand using a blind stitch.

12. Your dinosaur should be done.  Here's one of mine prowling through the garden...


I hope you enjoy making yours!