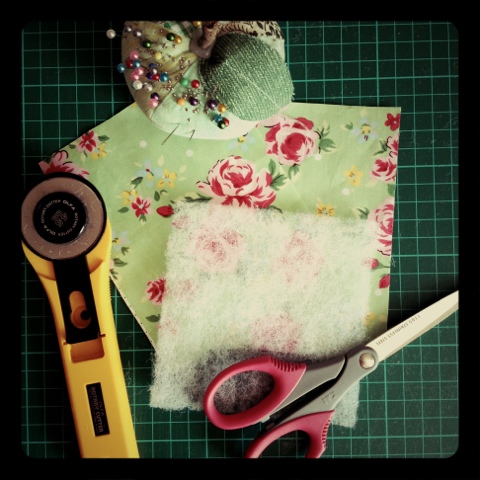
Showing posts with label crafts. Show all posts

Thursday, 11 September 2014

Pine Cone Mobile

When we went to France in the summer my daughter began sneaking pine cones into her bag, which she then insisted on keeping and bringing back home!  I wanted to help her do something interesting with them but thought it unlikely that they'd last until Christmas when we could spray them gold or silver and hang them as decorations.  So we sat down together and painted them in other bright colours and created a mobile for her bedroom!


We can also add to the mobile as it's just two sticks tied together with string, and the hanging items looped over.  As you can see we've already added a salt dough heart that she made - it just needed rearranging a bit to keep the balance.  We used quite rough brown string to keep it looking rustic and natural.  Plus it makes life easier if the intentional look is a bit rough around the edges!


Saturday, 21 June 2014

Probably the quickest and easiest DIY project you'll ever see!

I harbour a disproportionate amount of rage towards all of the wires and cables that occupy my world. As per usual, I'm full of good intentions to solve the issue with a flurry of searching and pinning for neat little cable tidies and holders. For which I then lack the motivation, time or inclination to execute. But whilst sitting and thinking about how I want to get the job done but can't be bothered right now (not lazy by nature - just work, toddler, pregnancy-inflicted fatigue!) something occurred to me. All you need is velcro! And it need only cost pennies! Velcro is something I seem to have lots of and I'm not sure why. I think it's one of those items that's easy to overlook but can halt a project in it's tracks. So it is useful to always have some available - I would definitely recommend that you buy yourself a metre or two just to have around for occasions such as these. 

1. For headphones I cut a 3 inch length of velcro. For bigger/longer cables and wires just increase this length, e.g 6 inches for laptop cable.


2. Pull apart and refix with up to an inch of overhang at either end. You can adjust this once you've tried it out if it needs to be longer or shorter. 


3. Wrap and fix around annoying and disobedient wire. 


4. That's it. Done! Neat, tidy, quick and super cheap. Now sit back and feel smug about the task you've just completed!

Sunday, 9 March 2014

Rosi's Mobile Making Baby Shower

I love a crafty baby shower. It gives the event such a lovely feel; all making something for the new arrival. For mine we each made a flag for bunting and for my sister-in-law we all painted a little canvas for the nursery wall. So when it was my turn to organise the do for my wonderful friend Rosi I wanted to do something similar, but not something any of us had done before. Cue lots of pinning! As well as the above ideas there were some other good ones, like bib and babygro decorating.

Here's what we did...


A couple of us took along bits of card, paper, ribbons, buttons and anything else suitable for sticking together. I also took along a little kite shaped template. We then all made a kite to our own design to then hang together in a mobile. 


It was lots of fun, and still left us time to eat cake, drink tea and open presents within a couple of hours.

It then fell to me to put the mobile together! It was trickier than I expected as it became something of an exercise in engineering and balance! I made a large cloud using 6 pieces of white card cut in symmetrical cloud shapes, which I folded in half and glued together with prittstick. I then used the trusty glue gun to stick a long length of cotton to each kite. This was in a different position for each one in order to balance them in a good flying position (due to everyone's individual designs). I used a needle and thread to attach a kite to each arm of the cloud. I also made a couple of small clouds to use as additional balancing weights and give it a bit of visual balance too. 

And this is how it turned out:


Monday, 17 February 2014

JLW's New Bag

When Jola needed a new bag for nursery I tried really hard to find one on Etsy; I like supporting other people's handmade businesses.  I found one, but it was going to cost nearly $30 to ship, which made it much too pricey!  I had recently pinned a tutorial on Pinterest so decided to give it a go.  It's this one here by the Ribbon Retreat.  It's a really straightforward tutorial with easy to follow instructions and pictures.


As it's quite a simple design it was pretty easy to add some additional touches so I made a few changes:
- I added a couple of inches to the side panel pieces to make it wider.
- I added an elasticated front pocket, with velcro fastening and button decoration.
- I added piping to the main body seam.
- I machine stitched initials onto the front.

Changes I didn't make but should have done:
- I shouldn't have bothered with the piping; I'm not very good at it!
- I should have brought the straps closer together at the top as they currently sit too wide to stay on my toddler's shoulders.

I am definitely going to try another one in the future now that I've learnt some lessons for this one!

Sunday, 1 December 2013

Mini Advent Stockings!

I'm aware that today is 1st December, aka the first day of Advent. But I've been so busy - had a wonderful time at Lewes Artists and Makers yesterday - that I didn't get round to preparing anything. If only I'd spent less time researching blogs and Pinterest and more time making! But I woke up this morning and gave myself a good talking to. I realised that I don't have to make 24 of something for today...just the first one! So I quickly made myself a miniature stocking template (find it here) and whipped this up by cutting out two pieces of stocking shaped fabric as per pattern.  (Don't forget to do opposite shapes for the front and back if your fabric has a right side)  I used fusible interfacing prior to cutting on one side of the fabric as it stiffens it up and it also means you can just draw straight round the template and then cut.  I folded over the top edge (just once, but you could do it twice) with a 5mm seam allowance and stitched.  On the back piece a stitched a folded piece of ricrac about 1 cm in from the back edge of the stocking so that it can be hung up.  I used bondaweb on the back of coloured felt and cut out a number 1 and then ironed it to the front piece of the stocking.  I then placed the fabric right sides together and stitched round the outside using a 5mm, leaving the top edge open.  Using pinking shears I trimmed the edges - the interfacing also means the raw edges won't fray so is perfect for this quick project.  Turn the little stocking inside out and you should have a cute little stocking to hang on the mantelpiece or somewhere equally as festive!  Now repeat 23 times!


I bought the fabric especially a while ago. I was also able to do tomorrow's stocking. When we were younger my mum made some very similar stockings (another idea pinched from her, despite the hours on Pinterest!) and every morning a new stocking would appear with a little goodie inside - a toy, choc or other treat! Jola is still a bit little to get it, so I figure I can use this year to make the advent stockings and start the treat bit next year. I'm so pleased I realised it wasn't too late! And there are still a few hours of the 1st left, for anyone who's feeling as disappointed as I was with myself this morning!

Saturday, 16 November 2013

Wintery Knit Knit

I'm not a very fast knitter. It was probably my first craft, but it is not my craft of choice! I love hand knitted items and would love to improve. My mum's one of those casual, chatting, watching TV, super fast knitters, whipping up a little cardi in a couple of evenings.  I've tried doing it without looking, for about 10 seconds, but I may as well look for all the concentration and teeth gritting it takes!

Anyway, I decided to attempt a hooded cardigan for my little girl. I took great pleasure in searching Ravelry (where I could lose hours!) for a suitable pattern. Found a good one here

But I started knitting it about 9 months ago, for age 18-24 months.  She's now 26 months and it's not finished.  I got up to the hood and abandoned the plan.  I decided to convert the hood into a little bonnet.  And here's the result!...


For the last 8 rows I added 30 stitches on each end and changed to a rib stitch to shape it round the face and allow it to be tied under the chin.  I then folded it in half and stitched the back seam.  I'm also planning on putting a popper on the strap so it's secure.  Oh, and I made a pompom for the top.  It's a little small, naturally, and isn't quite shaped right.  But I'm pleased with it and it looks so cute!

There are proper patterns available - like this one - so sweet!  A much more realistic goal for a non-speedy knitter like me!

Friday, 19 July 2013

Crafty Coasters

I made a bunch of these as Christmas presents last year and I think they fit that old cliché of simple yet effective. Choosing fabrics for particular friends can really make them more than just coasters.  My friend Rae recently acquired a new poodle and a new house, so I made a set of 4 French poodle inspired coasters for her new abode.


For each coaster you will need:
- a piece of fabric measuring 4.5" x 11"
- a piece of medium weight wadding measuring 4.5" x 4.25"
- the usual gear: pins, threads, sewing machine, scissors...

1) Cut your fabric so that you have 2 pieces each measuring 4.5" x 5.5".


2) Place your fabric and wadding in the following order: wadding, fabric right side up, fabric right side down (see photo).


3) Your piece of wadding needs to be lined up against 3 edges of your fabric.  Pin and sew around 3 edges using a 1/4" seam allowance, starting on the long edge furthest away from where your wadding is placed.  This will leave one seam open.


4) Trim corners and sewn edges.


5) Turn inside out, poke out your corners and press.  Tuck in the open edge of your coaster about 1" - measure your coaster to make sure it's square; it should be 4" square.  Press and pin.


6) You will now top stitch the coaster in a right-angled spiral.  I usually start this on the edge of the coaster before your still open seam, rather than on the open seamed edge.  Place your needle 1/4" in from the edge of the seam you'll be following, but right at the end of the coaster.  Hopefully this diagram of the spiral will help as this is the pattern your top stitch should follow:


7) Stop sewing when you're 1/4" away from the next edge - for the first 3 lines this will be the end of the coaster, but from then on you'll stop sewing 1/4" away from your previous line of top stitch.  Make sure the needle is down, lift the sewing machine foot, turn your work 90° anticlockwise, put the foot down and sew another straight line until you get 1/4" from the opposite edge or a previously sewn seam.  You will repeat this action again and again until you have spiraled into the centre of the coaster.  Do a couple of reverse stitches when you've finished to secure the thread. 


I hope this makes sense!


8)  I usually trim the threads in the centre of the coaster and knot the tails at the start of the top stitch before trimming.


Your coaster is finished!  These work as lovely gifts in packs of 4, so repeat the whole lot 4 times to complete your set!  If you're feeling super crafty you could make some matching placemats by hopping over to this tutorial by Chloe at Gannet and Parrot.


Wednesday, 12 June 2013

Build Your Own Tipi - Teepee - Wigwam!

Last week as the sun started shining I wanted to get my little girl some exciting things for the garden.  I was initially looking into some little pop-up tents when I came across a couple of amazing tipis - so much prettier and lovelier!  They are so fun but I didn't really want to spend too much money so I decided to give one a go myself.


You will need:
- 4 metres of 44" width fabric or 2.5 metres of 60" width fabric for main body of tipi
- 5 x strips of fabric measuring 3" by 60" for the pole casing
- 5 x 6ft bamboo canes (or other similar poles)
- 2 x 44" pieces of bias binding
- 4 x 16" strips of fabric/bias binding for ties
- small piece of fabric and Bondaweb for star patch

I got my star fabric as an emergency purchase from Dunelm Mill - I desperately wanted to start making this and didn't want to spend the normal few days researching!  I had a meeting in Eastbourne and was passing so I popped in.  Saw this immediately and loved it! I also got 10 6ft bamboo canes from B&Q for under £4.

1. Cut 5 triangles to this size:
You'll need to do this in different ways depending on your width of fabric.  If you have 60" width fabric you can zigzag your way across the fabric until you have 5 pieces - they'll be slightly taller than 60" but that's fine (just adjust other measurements accordingly).  If you have 44" width fabric (like I did) it's a bit trickier but you can definitely do it with 4.5 metres. 

2.  Cut 6 inches off the top of each triangle.


3.  Fold down (twice) and press the hems at the top and bottom of each triangle.


4.  Stitch your hems.


5.  Measure the finished side length of your triangles.  Your 5 strips for pole casings need to be this length plus a couple of inches for your hems.  Mine measured 56" by 2.75".  Fold down (twice) press and stitch.


6.  Fold strips in half and press.


7.  Take 2 of your large hemmed triangle pieces.  Lay one right side up.  Line the pole casing up against the raw edge (as shown in photo) and lay another triangle piece right side down.  Pin in place.  Using a 3/8 inch seam allowance (approx. 1cm), sew this seam.  Trim seam allowance.


8.  Take another 2 triangles and repeat step 7.  You will now have 2 separate pieces made up of two large triangles with casing stitched in between.  Now repeat this step to join these two parts of your tipi together.  You will now have one single piece of work in the following order: triangle, casing, triangle, casing, triangle, casing, triangle.  Put this to one side for the moment.

9.  You should have one large triangle piece left.  Fold this in half and press.  Cut along the fold line until approx. 9 inches from the top of the piece - the cut will measure approx 44 inches.


10.  Take 2 pieces of bias binding (folded and pressed) and stitch in place along the cut fabric.  To neaten the bottom of opening allow an extra inch of binding and fold it up before sewing.


11.  Iron an 8cm x 8cm piece of Bondaweb to a piece of yellow fabric.  Cut out the shape of a star and then iron it to the top end of the opening, placing it a few millimetres over the top of the binding.  Of course you don't have to have a star - most other shapes will do the same job!


12.  Use a zigzag stitch to sew around the outside of the star patch, securing it in place as well as strengthening the opening.


13.  Use ribbon or binding (pressed and sewn in half) and place and pin somewhere along both sides of the opening using even spacing.  Mine were 14 inches apart.  Sew in place.


14.  Now sew this last triangle piece to the rest of the tipi along the two seams using the same process as in point 7, with the pole casing placed in between the fabrics.

15.  All your sewing should now be done!  Feed the bamboo canes into the pole casings.  Spread out the tipi and use ribbon, binding or a strip of fabric to tie the poles where they cross over (approx. 1ft from the top of the poles) to keep them secure.

16.  All done!  Have yourself a pow-wow!


If I'm honest my pole casings didn't always match the exact length of the side of the triangles - I think partly because I was so desperate to finish it before it stopped being sunny and partly because my triangles were a bit uneven too!  But fortunately little J doesn't seem to care!

Sunday, 9 June 2013

DIY Sleep Eye Mask!

As dawn broke this morning I woke. As I do every morning at about 5.30 because our silly little curtains let all the light in. Admittedly my own fault, but super frustrating all the same. So at 5.30 this morning I planned this out.

It'd make a great going-away gift for someone heading off on their travels.  You could also embroider or personalise the outer piece of fabric before stitching it together.

You will need:
- 2 pieces of fabric measuring 10cm x 25 cm
- 5mm elastic about 37cm in length (cut it a bit longer and then check before you sew)
- 10cm by 25cm piece of wadding
- pattern for eye piece, which you can find here

1. Using the pattern, cut two shapes in your fabric and one piece in wadding.


2. Stack as follows: wadding, fabric right side up, pin elastic as shown in photo and as indicated on pattern, then final fabric piece wrong side up. Pin in place.


3. Leaving a 1.5" opening and using a 1cm seam allowance, sew around the outside of your work.


4. Clip/pink edges.


5. Turn inside out through the opening. Poke out edges (my poking device of choice is usually a knitting needle).

6. Press.

7. Blind stitch opening.


8. Sleep in peace!


Modelled by dishy husband!