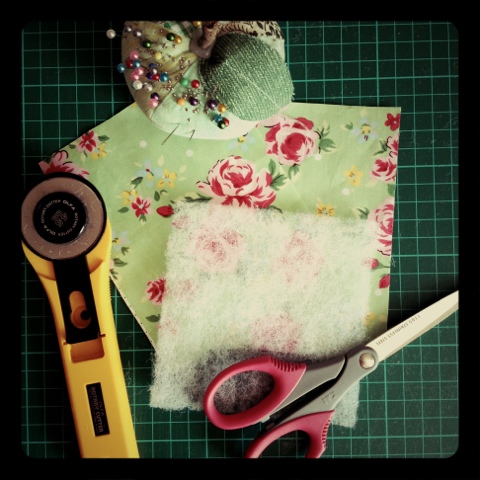
Showing posts with label scraps. Show all posts

Tuesday, 29 April 2014

Easy Peasy Zippy Pouches

I had some left over fabric from the changing bag I made for my friend and I know she wants to use reusable nappies so using the scraps to make a waterproof pouch for transporting wet apparel seemed appropriate!  A useful idea for any of us with little ones, not just those with soggy bottoms!


We're also in the process of moving house, which reminded me that for months I've been planning on making some bags to store some of my daughter's toys.  


I found a couple of straightforward tutorials through my old friend Pinterest, such as this one on See Kate Sew.  I got a bit confused by the reference to folding the zip towards the lining when sewing the two sides of your pouch together.  It felt weird and bulky and not right.  I explored a bit further and found some instructions with pictures of what this step should look like, the most helpful of which was this one at Pink Stitches.  The pouches described on this last blog were a little more complicated on the whole (would make great gifts!), but the pictures simplified the process for me.  I also like the way she has secured and extended the zips with small pieces of fabric.  I used this idea for a couple of my pouches as the zips I had were all pretty small and I sometimes find my zip slipping when I sew it.  This is a great way of solving both problems!


Apologies for not creating any new tutorials recently, but I've mainly been using other people's so I'd rather direct you to them than try and come up with my own when I know they already exist.  

Sunday, 1 December 2013

Mini Advent Stockings!

I'm aware that today is 1st December, aka the first day of Advent. But I've been so busy - had a wonderful time at Lewes Artists and Makers yesterday - that I didn't get round to preparing anything. If only I'd spent less time researching blogs and Pinterest and more time making! But I woke up this morning and gave myself a good talking to. I realised that I don't have to make 24 of something for today...just the first one! So I quickly made myself a miniature stocking template (find it here) and whipped this up by cutting out two pieces of stocking shaped fabric as per pattern.  (Don't forget to do opposite shapes for the front and back if your fabric has a right side)  I used fusible interfacing prior to cutting on one side of the fabric as it stiffens it up and it also means you can just draw straight round the template and then cut.  I folded over the top edge (just once, but you could do it twice) with a 5mm seam allowance and stitched.  On the back piece a stitched a folded piece of ricrac about 1 cm in from the back edge of the stocking so that it can be hung up.  I used bondaweb on the back of coloured felt and cut out a number 1 and then ironed it to the front piece of the stocking.  I then placed the fabric right sides together and stitched round the outside using a 5mm, leaving the top edge open.  Using pinking shears I trimmed the edges - the interfacing also means the raw edges won't fray so is perfect for this quick project.  Turn the little stocking inside out and you should have a cute little stocking to hang on the mantelpiece or somewhere equally as festive!  Now repeat 23 times!


I bought the fabric especially a while ago. I was also able to do tomorrow's stocking. When we were younger my mum made some very similar stockings (another idea pinched from her, despite the hours on Pinterest!) and every morning a new stocking would appear with a little goodie inside - a toy, choc or other treat! Jola is still a bit little to get it, so I figure I can use this year to make the advent stockings and start the treat bit next year. I'm so pleased I realised it wasn't too late! And there are still a few hours of the 1st left, for anyone who's feeling as disappointed as I was with myself this morning!

Friday, 19 July 2013

Crafty Coasters

I made a bunch of these as Christmas presents last year and I think they fit that old cliché of simple yet effective. Choosing fabrics for particular friends can really make them more than just coasters.  My friend Rae recently acquired a new poodle and a new house, so I made a set of 4 French poodle inspired coasters for her new abode.


For each coaster you will need:
- a piece of fabric measuring 4.5" x 11"
- a piece of medium weight wadding measuring 4.5" x 4.25"
- the usual gear: pins, threads, sewing machine, scissors...

1) Cut your fabric so that you have 2 pieces each measuring 4.5" x 5.5".


2) Place your fabric and wadding in the following order: wadding, fabric right side up, fabric right side down (see photo).


3) Your piece of wadding needs to be lined up against 3 edges of your fabric.  Pin and sew around 3 edges using a 1/4" seam allowance, starting on the long edge furthest away from where your wadding is placed.  This will leave one seam open.


4) Trim corners and sewn edges.


5) Turn inside out, poke out your corners and press.  Tuck in the open edge of your coaster about 1" - measure your coaster to make sure it's square; it should be 4" square.  Press and pin.


6) You will now top stitch the coaster in a right-angled spiral.  I usually start this on the edge of the coaster before your still open seam, rather than on the open seamed edge.  Place your needle 1/4" in from the edge of the seam you'll be following, but right at the end of the coaster.  Hopefully this diagram of the spiral will help as this is the pattern your top stitch should follow:


7) Stop sewing when you're 1/4" away from the next edge - for the first 3 lines this will be the end of the coaster, but from then on you'll stop sewing 1/4" away from your previous line of top stitch.  Make sure the needle is down, lift the sewing machine foot, turn your work 90° anticlockwise, put the foot down and sew another straight line until you get 1/4" from the opposite edge or a previously sewn seam.  You will repeat this action again and again until you have spiraled into the centre of the coaster.  Do a couple of reverse stitches when you've finished to secure the thread. 


I hope this makes sense!


8)  I usually trim the threads in the centre of the coaster and knot the tails at the start of the top stitch before trimming.


Your coaster is finished!  These work as lovely gifts in packs of 4, so repeat the whole lot 4 times to complete your set!  If you're feeling super crafty you could make some matching placemats by hopping over to this tutorial by Chloe at Gannet and Parrot.


Saturday, 15 June 2013

Square Hot Pot Holder

The other part of my Friday Challenge was to make something using an old pair of jeans.  This is what I came up with...

1.  OK, so this first bit has nothing to do with my old jeans!  Cut a square of cotton 9 inches by 9 inches.  I had a few scraps of this tea cup fabric left over from some coasters that I made for Christmas presents last year so I stitched them together to get my square.


2.  Cut an 9" x 9" square from your old jeans.

3.  You'll also need an 9" x 9" square in heavy duty wadding.  If you haven't got the really thick stuff you could also use a couple of layers of less weighty wadding.  I got mine from Fabricland in Brighton and I've been assured that it is 'combustion-modified', which basically means it won't burst into flames.  Pretty crucial for an oven mitt.


4.  Once you have these 3 squares layer them as follows: wadding, cotton fabric right side up, denim square right side down.  Pin.  Using a 1/2 inch seam allowance stitch 3 sides of the square.


5.  Trim corners and seams and turn inside out.  Press.

6.  Turn the open seam inwards half an inch, press and pin.  In one corner I tucked in a folded piece of 1 inch wide fabric braid to form a hook.


7.  Once pinned in place top stitch around the whole of the square about 5mm in from the edge.  This will close up the open seam and hold the tag in place.


Sunday, 9 June 2013

DIY Sleep Eye Mask!

As dawn broke this morning I woke. As I do every morning at about 5.30 because our silly little curtains let all the light in. Admittedly my own fault, but super frustrating all the same. So at 5.30 this morning I planned this out.

It'd make a great going-away gift for someone heading off on their travels.  You could also embroider or personalise the outer piece of fabric before stitching it together.

You will need:
- 2 pieces of fabric measuring 10cm x 25 cm
- 5mm elastic about 37cm in length (cut it a bit longer and then check before you sew)
- 10cm by 25cm piece of wadding
- pattern for eye piece, which you can find here

1. Using the pattern, cut two shapes in your fabric and one piece in wadding.


2. Stack as follows: wadding, fabric right side up, pin elastic as shown in photo and as indicated on pattern, then final fabric piece wrong side up. Pin in place.


3. Leaving a 1.5" opening and using a 1cm seam allowance, sew around the outside of your work.


4. Clip/pink edges.


5. Turn inside out through the opening. Poke out edges (my poking device of choice is usually a knitting needle).

6. Press.

7. Blind stitch opening.


8. Sleep in peace!


Modelled by dishy husband!

Tuesday, 4 June 2013

Super Simple iPhone Sleeve

For this very simple iPhone case you will need:
  • Small pieces of fabric
  • Pins
  • Sewing machine and thread
  • Scissors
You can make this for other phones easily by measuring the phone and adding a couple of centimetres for sides and seam allowance.  It's made to have two handy little pockets either side for cards or other bits and pieces.  You can leave these out or just have one...it's up to you!

1.  Cut 2 pieces of fabric 8.5cm wide and 13.5cm long (this is for an iPhone 4/4S; for iPhone 5 add 1 cm to length).  These are the black pieces and they will be referred to as the 'long' pieces.  Cut 2 pieces of fabric 8.5cm wide and 9.5cm long.  These are the patterned pieces and will be referred to as the 'short' pieces.


2. Turn, press, pin and stitch one of the shorter sides of both short pieces of fabric.


3.  Stack your fabric pieces as follows: long piece right side up, short piece right side up, short piece wrong side up, long piece wrong side up. 


4.  Pin and stitch, leaving the top end open. 


5.  You can check at this point that the sleeve fits your phone snugly, and re-stitch seams if necessary.  Then trim corners.


6.  Turn raw edge down, press and stitch.  If too fiddly to do by machine you can do this by hand.


7.  Turn inside out.  Press.  Ta da!


Thursday, 23 May 2013

Oh Scrappy Day!

When does scrap fabric become such a tiny useless piece of fluff that you really must throw it in the bin?  For me?  Never.  

My ever-growing bag of felt scraps - some can only really be described as fibres!
Unfortunately this means I am now drowning in scraps.  I've got drawers and drawers of the stuff.  My big dream is that one day I'm going to sew it all together to form a beautiful quilt full of wonderful memories connected to each little fragment.  This is unlikely.  But I'm holding onto it.  In the meantime, I'm always on the think and lookout for lovely little projects to help me work my way through my trove.  And I imagine that I'm not alone.  So I'm going to attempt a regular scrap-based tutorial for others like me.  Or anyone who'd like to give something a go!

So head over to my 'Scrappy Days' page and check out my first effort - a pretty Peter Pan collar.  Let me know what you think!  Thanks!

Peter Pan Collar Tutorial


There are a number of different ways of creating these, and this is my way!

Materials needed:
  • Fabric of your choice – enough for 4 collar pieces (approx. 30cm x 30cm)
  • 2 pieces of ribbon, about 30 cm in length and 5mm wide
  • Paper pattern of collar piece – can be traced or printed from here
  • Thread
  • Pins
  • Needle
  • Sewing machine (although could be done by hand)
  • Buttons, beads or sequins for embellishing
  1. Using paper pattern, cut 4 collar sections.  I've used 2 different fabrics, one for the main fabric and one as the lining.  

  2. Place one collar piece right side up. Pin one end of a piece of ribbon at the 'stumpy' end of the collar, with the long tail of the ribbon lying inwards – see photo.

  3. Place another collar piece on top, right sides together and pin in place.

  4. Leaving an opening of approx. 1.5 inches on one edge, machine stitch around the collar (with a 3/8" seam allowance).  I've done mine on the inside curve but would probably try it on the outside curve next time.   Be careful not to catch the ribbon in your sewing; you can use the opening to keep the ribbon out of the way.

  5. Trim corners and clip seams.

  6. Turn inside out. Press.

  7. Blind stitch the little opening, or you can top stitch the whole collar piece.

  8. Now repeat from point 2 for your second collar piece.

  9. Using needle and thread, stitch your two pieces together (as shown in photo).

  10. You can sew a button or bead in the centre of the collar if you fancy it! Buttons look particularly cute on little girls!

    You could of course use this as a base and add additional embellishments on the collar, either on your finished piece or before stitching it together.  It's also possible to make it a safer fashion accessory for little ones by extending the length of the pieces (at the end where you'd normally put the ribbon) and attach velcro tabs instead.

As this is my first tutorial I would appreciate your feedback!

Thanks!